Guilt Free Sewing:
Monday December 22, 2013
Clothing and all things tied to fashion and function have been readily available to me during my entire lifetime. So where did this desire to do things myself, to make my own bras, sew my own curtains, even knit my own socks, come from? Ah, I have pondered on that question for years.
Sewing is an art, a way to save money, a way to do things the way you want. Right? Why then do I feel guilty sitting at my machine knowing I could get on the internet and purchase what I need and have it here tomorrow? Why indeed?
So it must be about the art. It must be about understanding sewing as a skill and about the knowledge one gets from sewing for thier own bodies and homes.
I have found that as much as I have dieted and worked out, in and out of the gym, I can't fit into a size 4, 6, 8, 10 0r a 12. Mabye a 14, you say. Well then I could always take out the extra ease and use my measurments to scale the pattern to fit right? Oh if only that would work. If only. But truly if it works for you I would say you don't need to be reading this blog.
They say if you can't find what you seek from the world then you must create it. I truly believe this motto. My quest to design and sew for myself is me following this motto. I will never be a size 6 without alterations. Why then do I have to use patterns that require alterations? Truth is I don't. And I will need to get past the frustration over my guilt at passing on cute cloths that just don't fit or will shrink with the first wash and then not fit. I must forge on and stake my claim that I am worth it.
This past year I sewed two bras, and six pair of panties for myself and I taught and helped three students learn to sew their own bras. I designed and sewed three new swimsuits, and helped a student design and sew her own swimsuit. She also learned how to restyle and fit her own bra pattern. It is my greatest pleasure to see a beautifully finished product that one can actually wear and enjoy wearing.
This was not all though, I also designed and sewed two bikinis for my daughter, a beautiful summer dress, and a yoga top with a shelf bra.
Why do you question your worth? Why do you feel guilty? I would love to hear what motivates you and what stops you.
I have never regretted creating and sewing anything I have put my mind to doing. Never. So I resolve to sew and design more. I welcome you to join me in the new year. You will find me at my sewing machine. Happy Holidays. 2013.
See you all next year.
Sewing Guild Retreat:
Tuesday September 24, 2013
Located in the foothills of southeastern Utah, outside of Fairview Utah is Hiddaway Inn. A great homey place that exudes creative emotions. There was plenty of space to create and enjoy two day of sewing and extra cirruclare activities provided by the sewing guild members.
I would encourage anyone who loves to sew and connect with other creatives with the same desires to give the Sewing Guild a look. The official site is www.slcasg.org
New Bra-Making Classes:
Wednesday August 28, 2013
I am pleased to write that I have long awaited new home for my classes. The Cotton Shop In Murray, Utah has offered to host my class. It is a great opportunity to come and learn the art of Bra Making. Join my co-op of women who already have purchased bra making accessories at a much reduced rate than if bought on your own.
See my class information page Bra-Making 101 for the latest information and class times.
I have been making bras for more than 3 years and I create my patterns individually, fitting and testing them in the process. This means that when you attend your first class your pattern will be specifically made for you with minimal fitting issues to resolve as you learn to make your first bra.
I love sewing and designing my own bras and I love sharing the process. Bra-making leads to so many other sewing opportunities. It's fun and easy. Can't wait to see you there. Jnetti.
Bra Elastics:
Monday, April 8, 2013
If you have been making your own bras or thought about it then you are aware that there are a limited number of retail merchants that sell the type of elastic found in retail ready made bras.
Using normal cotton or polyester elastic is not advised for bras. Let me explain and shed some light on why I think they don't or won't work.
- Regular elastic is flat and and offers no buffer between the elastic and your skin when sewn in a bra where the elastic is exposed. It doesn't grip the skin.
- The stretch would not allow expansion and movement in the bra with comfort and control of elastic made for bras.
- Plain elastic made for waistbands, cuffs, and other areas where you need elastic stretch on a garment made, does not offer the same soft backing that gives this specialized elastic the attributes to feel soft and hug the skin.
- Plain elastic can be purchased just about anywhere and is inexpensive and sometimes hard to tell the quality or durability of the stretch.
Because this specialty elastic is hard to find in most fabrics stores and if it is found, it is often packaged, looking for that label "plush or plushy backed" is extremely important. If it doesn't state that it is, it mostly likely isn't.
Understanding what gives this elastic the quality and what is inside the elastic is important for many reasons. My favorite, I like to know what things are made of and how they are made. But if you have an allergy to nylon, or rubber it can be a big problem.
So what I found is that the information regarding these elastics is extremely hard to come by.
The following photo shows various types and sizes of plusy elastic. I list where I found the elastic. Follow my advice and you will be buying quality that will save you in the end. This is one area I would splurge and overlook the cost to get the quality.
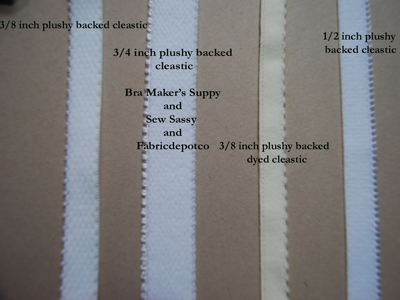
Plushy backed elastic has a soft cushion of stitches built in to the weaving process. Made of nylon, polyester, and rubber. I list all my three favorite internet sites that sell plushy back elastic. All three stores carry a huge variety of colors and widths. And they all label the elastic correctly.
I have dyed most of the basic products available and they have all done well. I haven't tried the color black.
One other thing to think about when buying elastic, the wider the elastic the better the hold, the better the hold the better the comfort. Use the right size elastic for you bust size. I find using at least a 1/2 inch to 1 inch wide on the bottom band for bra sizes greater than 40 works best.
There are a number of other online retailers selling this type of elastic. I have purchased from most of them. Stick with these three and you will get your money's worth.
Jnetti.
Coming soon "Panty and other Specialty Lingerie Elastics. "
Bra Design Inspiration:
Sunday, March 10, 2013
I have two bras that I designed with inspiration I found on the internet. The following pictures depict the bras I designed and created and the original bras. Using the photo, the style pictured is completely done freehand with an originally created pattern.
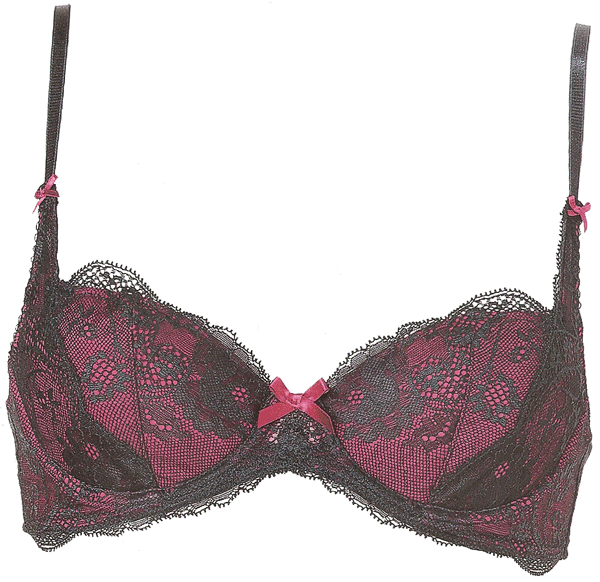
My version is on the top: Laperle is on the bottom. The asking price for this bra was $300.00.
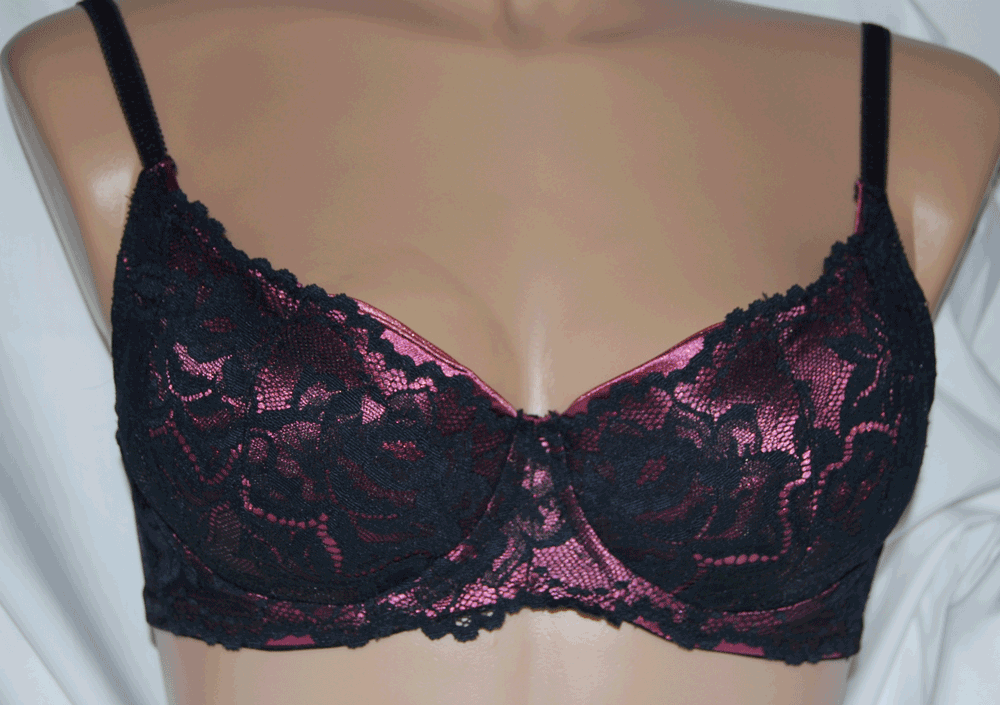
The other bra I designed and sewed is one that is perfect for everyday wear and fits greats. The copy is a simple Victoria Secret design. My version is on the left with the VS on the right.

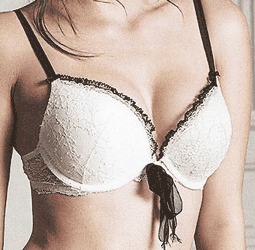
I prefer a little wider bridge and I didn't add the black trim. Since these are my first style designs, I was pretty happy with how they turned out. The Victoria Secret bra is around $50.00.
Happy bra making Jnetti.
Coming soon: Understanding bra elastics where to find best quality.
Under-Wire Channeling
or Casing Unraveled:
Monday, February, 25, 2013
This week's topic is about the differences in bra under wire channeling that are available now to the home seamstress or small business bra makers. After buying from all the perspective bra supply internet stores I share that know lege with you here.
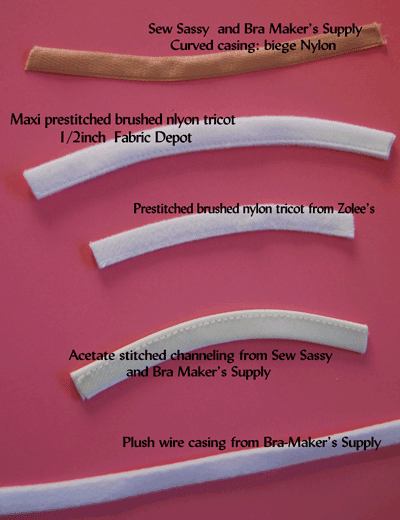
Knowing the differences and names of the available types of channeling can help to know where to best put your money. If you like the wicking ability and the comfy feel of cotton against your skin then I would recommend purchasing the plush wire casing from Bra Makers Supply. This is my favorite and the type I use in my bra kits.
I have used the nylon curved casing from Bra-Maker's Supply also and it works great. Sew Sassy also sells the nylon casing but it doesn't have the same curve to it.
Zolee's sells a soft form with a stitching line on one side. For the price it will work and would feel nice against the skin.
I have also used Acetate channeling from Sew Sassy. It comes in three colors and while my first choice is the plushy backed casing it does sew and lay nicely in the cradle.
You can also make your own. Be sure to include a thin fabric inside to line the channeling for strength.
I haven't used the Maxi under wire channeling (pre stitched brushed nylon tricot)from Fabric Depot, but I have purchased some. I like the feel and the depth, almost 1/2 inch wide. Would work great for thicker wires.
The following picture will give you a visual of the various channelings available.
If we continue to seek quality products they will eventually be found in abundance. Bra making is fun and there is nothing like the feel of a great fitting, beautiful, custom, bra. If you haven't yet tried to sew one let me ask you what is holding you back? And if you have done one or two, why not keep at it?
In my next post I have a great example of a beautiful bra that I saw and designed my own pattern to duplicate.
The Edge Stitch Foot
for Channeling Application:
Monday, February 11, 2013
So this week I would like to share another tip with under wire channeling that will bring professional results to all your efforts of application.
I use a Bernina sewing machine to sew my bras. I own a Brother also, that has been used to sew bras without difficulty, with the exception of a special foot and needle placement setup.
Brother does make a sewing machine that has the necessary foot attachment pictured below on the left. The Bernina foot is on the right.
This foot has is known by several names but I know it as Stitch in the Ditch Foot. Because it has an edge that lines up perfectly with the channeling and allows the needle to move inside to just barely catch the edge of the channeling.
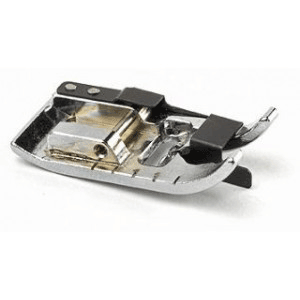
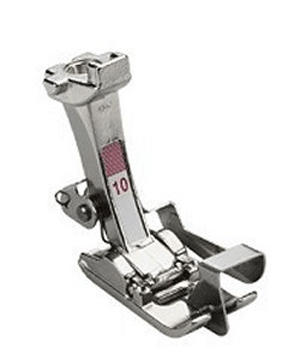
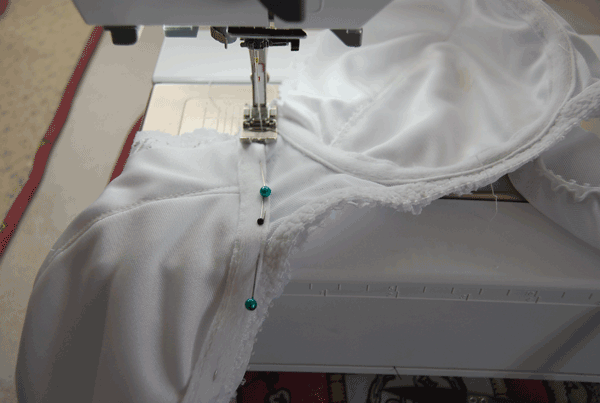
Shown here is the Open Toe Foot which is an easy alternative for the Edge Stitch Foot or as I know it, the Stitch in the Ditch foot. I used the inside open toe edge as my guide and when using the Stitch in the Ditch foot place the channeling edge against the edge stitch foot guide and bring the needle in as I have done here. Both feet are an excellent way to get that professional look to your bra.
Make sure that the foot is designed for zigzag. A foot designed specifically for a straight stitch will just not work.
Still to come: Channeling, how do you know what you are buying?
Under-Wire Bra Channeling
De-mystified
Sunday, February 3, 2013
If you are reading this then you have some idea that I am working on Bra-making. I am always trying to give back what I learn. Since I haven't had any actual formal classes on bra making, all of what I learn is through trial and error.
I am so grateful to all those who came before me and pushed on to help those of us who want to sew their own bras. They are real heros to this art form.
I want to share what I have learned about using channeling. A soft plushy backed tube developed and designed to house the bra under wire or give a bra stability without under wire in the cup.
I made my own channeling to use in my first bra that I did, I didn't have any of the purchased kind yet. It wasn't long before I enjoyed the ease of purchased channeling. But it took a few bras for me to understand how it worked and that leads me to share that information here.
How complicated can it be you ask? Well for me it was and many of students benefit from what I have learned.
I have included a photo of the channeling. How it looks when you get it in the mail or a kit.
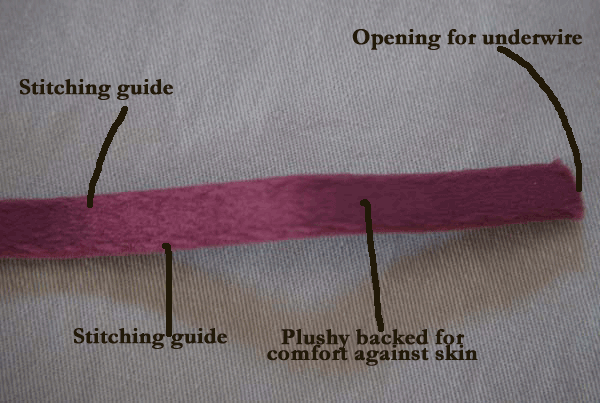
The side showing is the plushy side that would be sewn in so it is on the outside of the bra against the body. The two outer edge stitch guides help to enable the sewer to sew the channeling in evenly. Since there is such a limited space between the two rows of stitching this is really important.
I am focusing on how channeling is developed and why. If you were to open the channeling you would see a lightweight inserted fabric. This is the lining that holds the under wire. So once the channeling is sewn in place the under wire fits inside the tubing perfectly. As shown in the following photo. I believe this channeling is made by fusing the edges under those outer stitch guides on the outer edges of the channeling. Handling and sewing the channeling are much easier than one would think. And channeling is one of the things that make a hand made bra look professional.
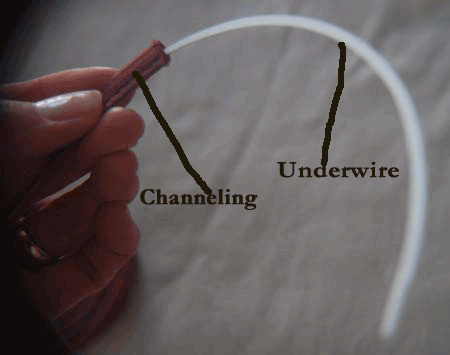 So if you see the under wire showing through your lace you will know that it needs to fit inside the tubing of the channeling.
Stay tune for my next bra making blog where we will learn the different types of channeling, the cost and where you can find them. And I will give you some insight to why you might prefer one over another type.
Jnetti.
Window Cling Stenciling
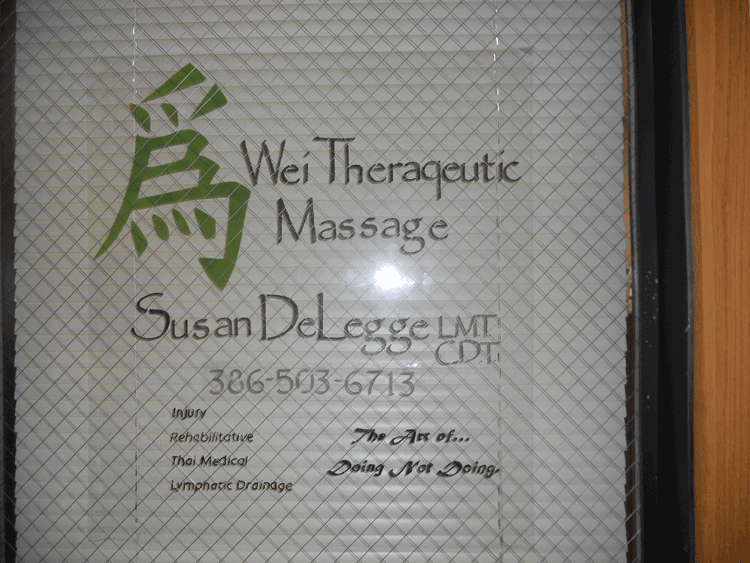
I am also working on a window sign for a colleague. I am using clear plastic window cling that I have stenciled on with her logo, name and other important information. She is my massage therapist helping me with my neck issues. She is also an amazing artist with her hands and massage. Her name is Susan DeLegge, you can follow the link by clicking on her name. She is founder and owner of Wei Therapeutic Massage in Murray, Utah.
Bra Under Wire Sizing:
Sunday, January 12, 2013
If you live anywhere in the mid west you know it's cold a brisk 5 degrees this morning. I push through it dressed with my warmer things that are usually too warm to wear on average days.
My thoughts today go to bra under wire and how to decide if yours is working for you or against you. When I first learned how to make my own bra and get the correct under wire I was astounded at how limited the information about under wires was. And the few great sites that offered information had their own unique way to measure this crucial piece. I studied all of them and tried them all.
I like to start with the bra size and see how close I can come using trial and error by using an actual wire on a client. I think this is the best method. I then use that wire to make the cradle pattern. (Keep in mind one under wire can fit four different bra sizes, so you will need under wires in a few B sizes closest to yours).
I am going to assume you are not able to have this done nor do you have extra wire sizes hanging around your home. I recommend using a fine gauge wire and enclosing the end of the wire as it completes a circle around one entire breast. The underwire that best fits this will likely be a great fit for you as well. I used Pattern making with Don McCunn, for this information. I could not find the link however. I would recommend checking with this site because he does include this in his process. He is closing his on line studio in December of this year.
This means for Bramakers we will lose one of the few great bra making sites available to the home seamstress/bra maker. It will hurt.
Here is a picture of the my actual wire so you can see how it should look when complete. The picture also demonstrates how the under wire is to fit the wire for the correct size.
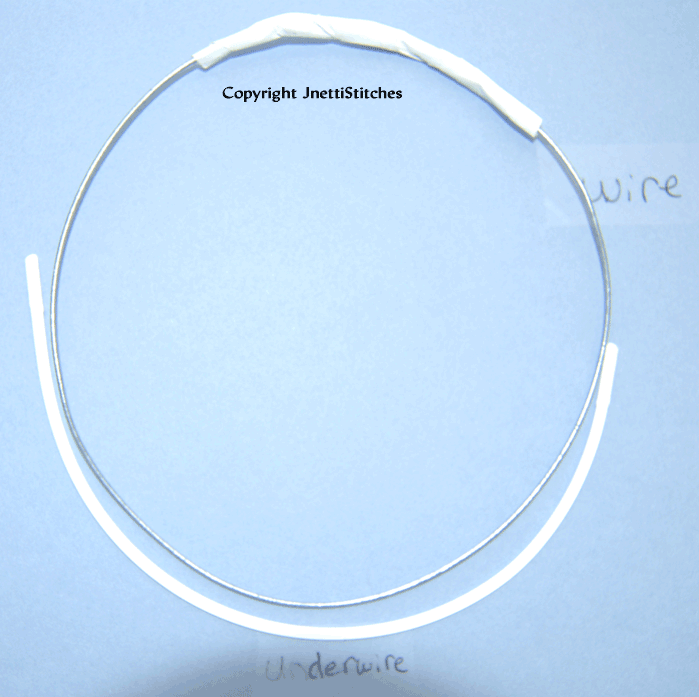
I hope this helps, a great fitting under wire can make or break the fit of a bra. Get your right size under wire today. Do it now.
Honoring a Legend Author, Pattern maker, Seamstress:
Dorothy Moore.
Wednesday, January 9, 2013
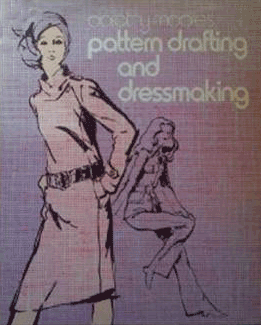
After spending a few hours trying to find anything about the author Dorothy Moore, who wrote the pattern drafting workbook “Pattern Drafting and Dressmaking”, I felt compelled to place it on my blog. To share it so others could read something about the women who learned so much about pattern making and fitting and shared it all in this book.
The book is an older edition written in the 70’s but the information and pattern drafting processes remains the same and understanding the material can only increase the knowledge and experience of the average seamstress/ pattern designer.
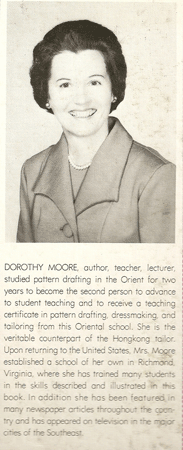
Dorothy D. Moore
1921-2009
Obituary
Dorothy D. Moore, 88, went to be with the Lord on Tuesday, March 24, at Autumn Care Of Mocksville after several months of declining health. Mrs. Moore was born in Swain County, NC on January 1, 1921. She was a daughter of the late Andrew Jackson and Nola Slagle DeHart. She was a member of Green Meadows Baptist Church and had read her Bible through more than twenty times.
Mrs. Moore was author of a book, Dorothy Moore’s Pattern Drafting and Dressmaking, which taught skills she had learned while living in Okinawa with her husband, who retired from the Army. While living thirty-two years at Kitty Hawk, NC, she was active in church, Bible studies and was an avid gardener.
Mrs. Moore is survived by her husband of forty-eight years, Paul A. Moore of the home; two daughters, Linda (James T.) Pullen of Falls Church, VA, Faye (Allen James) Hutchins of Mocksville, and a stepson, Timothy P. Moore of Cookeville, TN. She has one surviving sister, Della D. Dudis of Vandalia, Ohio, and one brother, D. C. Dehart of Midway, NC. Mrs. Moore has four grandchildren, Denise (Bill) McConnell of Marbury, MD, Patricia P. Henry of Winchester, VA, Wendy (Tim) King and Jay (Lori) Hutchins, both of Mocksville. There are presently three great grandchildren, Daniel and Emma King of Mocksville and Billy McConnell of Marbury, MD. She was preceded in death by three sisters, Esther S. Lawter, Shirley D. Lindsay, Marie S. Motsinger, and seven brothers, William Gudger Dehart, Everette J. Dehart, Norman B. Dehart, Arthur Lee Dehart, Rae Dehart, Wayne Dehart and Floyd Dehart.
The service to celebrate Mrs. Moore’s life was held on Friday, March 27, at 2:00 p.m. at Green Meadows Baptist Church with Rev. Michael Waters officiating. She will lie in state 30 minutes prior to the funeral hour. Burial was in the church cemetery. The family received friends Thursday, March 26, from 6:00 until 8:00 p.m. at Davie Funeral Service.
The family asks that memorials be considered for Green Meadows Baptist Church Building Fund, 1646 Hwy 801N, Mocksville, NC 27028.
Sunday January 6, 2013:
It is still cold here with low's in the single digits. The birds don't seem to mind and continue to flock to my feeders. Their will to live and their enjoyment of living and survival ignites my spirit to move past daily dilemmas and difficulties.
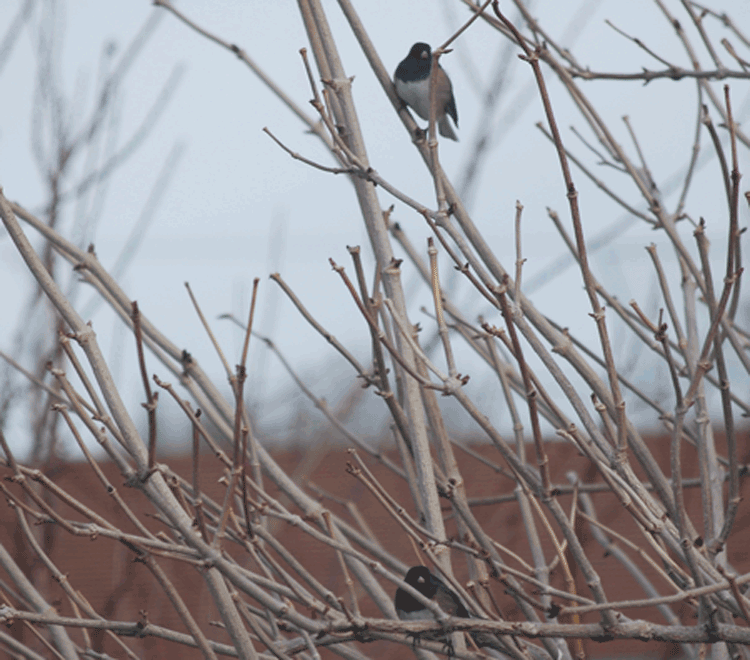 A Pair of California Juncos.
Today finds me working deep into my web site. I know now why they cost so much to have built.
A Pair of California Juncos.
Today finds me working deep into my web site. I know now why they cost so much to have built.
My craft/sewing room takes on many forms throughout the seasons. I design, sew, paint, craft, wrap gifts, make tags, work on business, cut up fabrics and do just about all aspects of my life in there. The room is where all my magazines, books, catalogs and other stuff get put. It takes a lot of effort to keep it clean and in working order. So I know a lot about organization and the tools to make it all work.
Bra Making 101.
Wednesday January 2, 2013
Welcome to my blog. A new year with lots of snow and cold weather. 2012 was a great year. I am working hard to get a new shorter more refined version of Bra-Making 101 directions for the Bra Making class.
I have been holding my classes at the fabric store Floyd and Lizzies in West Jordan. They are presently revising their store and cannot have my first of the year class. I am still holding the class and if you are interested this is a great time to sign up and get on the roles. I am doing semi private lessons in my home until I get more than 4 students.
The class cost will remain at $100.00.
I have lots going on in my creative space. I am presently working on creating a class for the design and building of a swimsuit pattern, to include sewing and making the swimsuit. This class is only open to those who have taken Bra-Making 101 or have a bra pattern and know how to make a bra.
This is where I plan to add all the great things I have looked at my have learned a lot along the way and there are some specific things I want to impart to anyone looking for information about any thing to do with bra making.
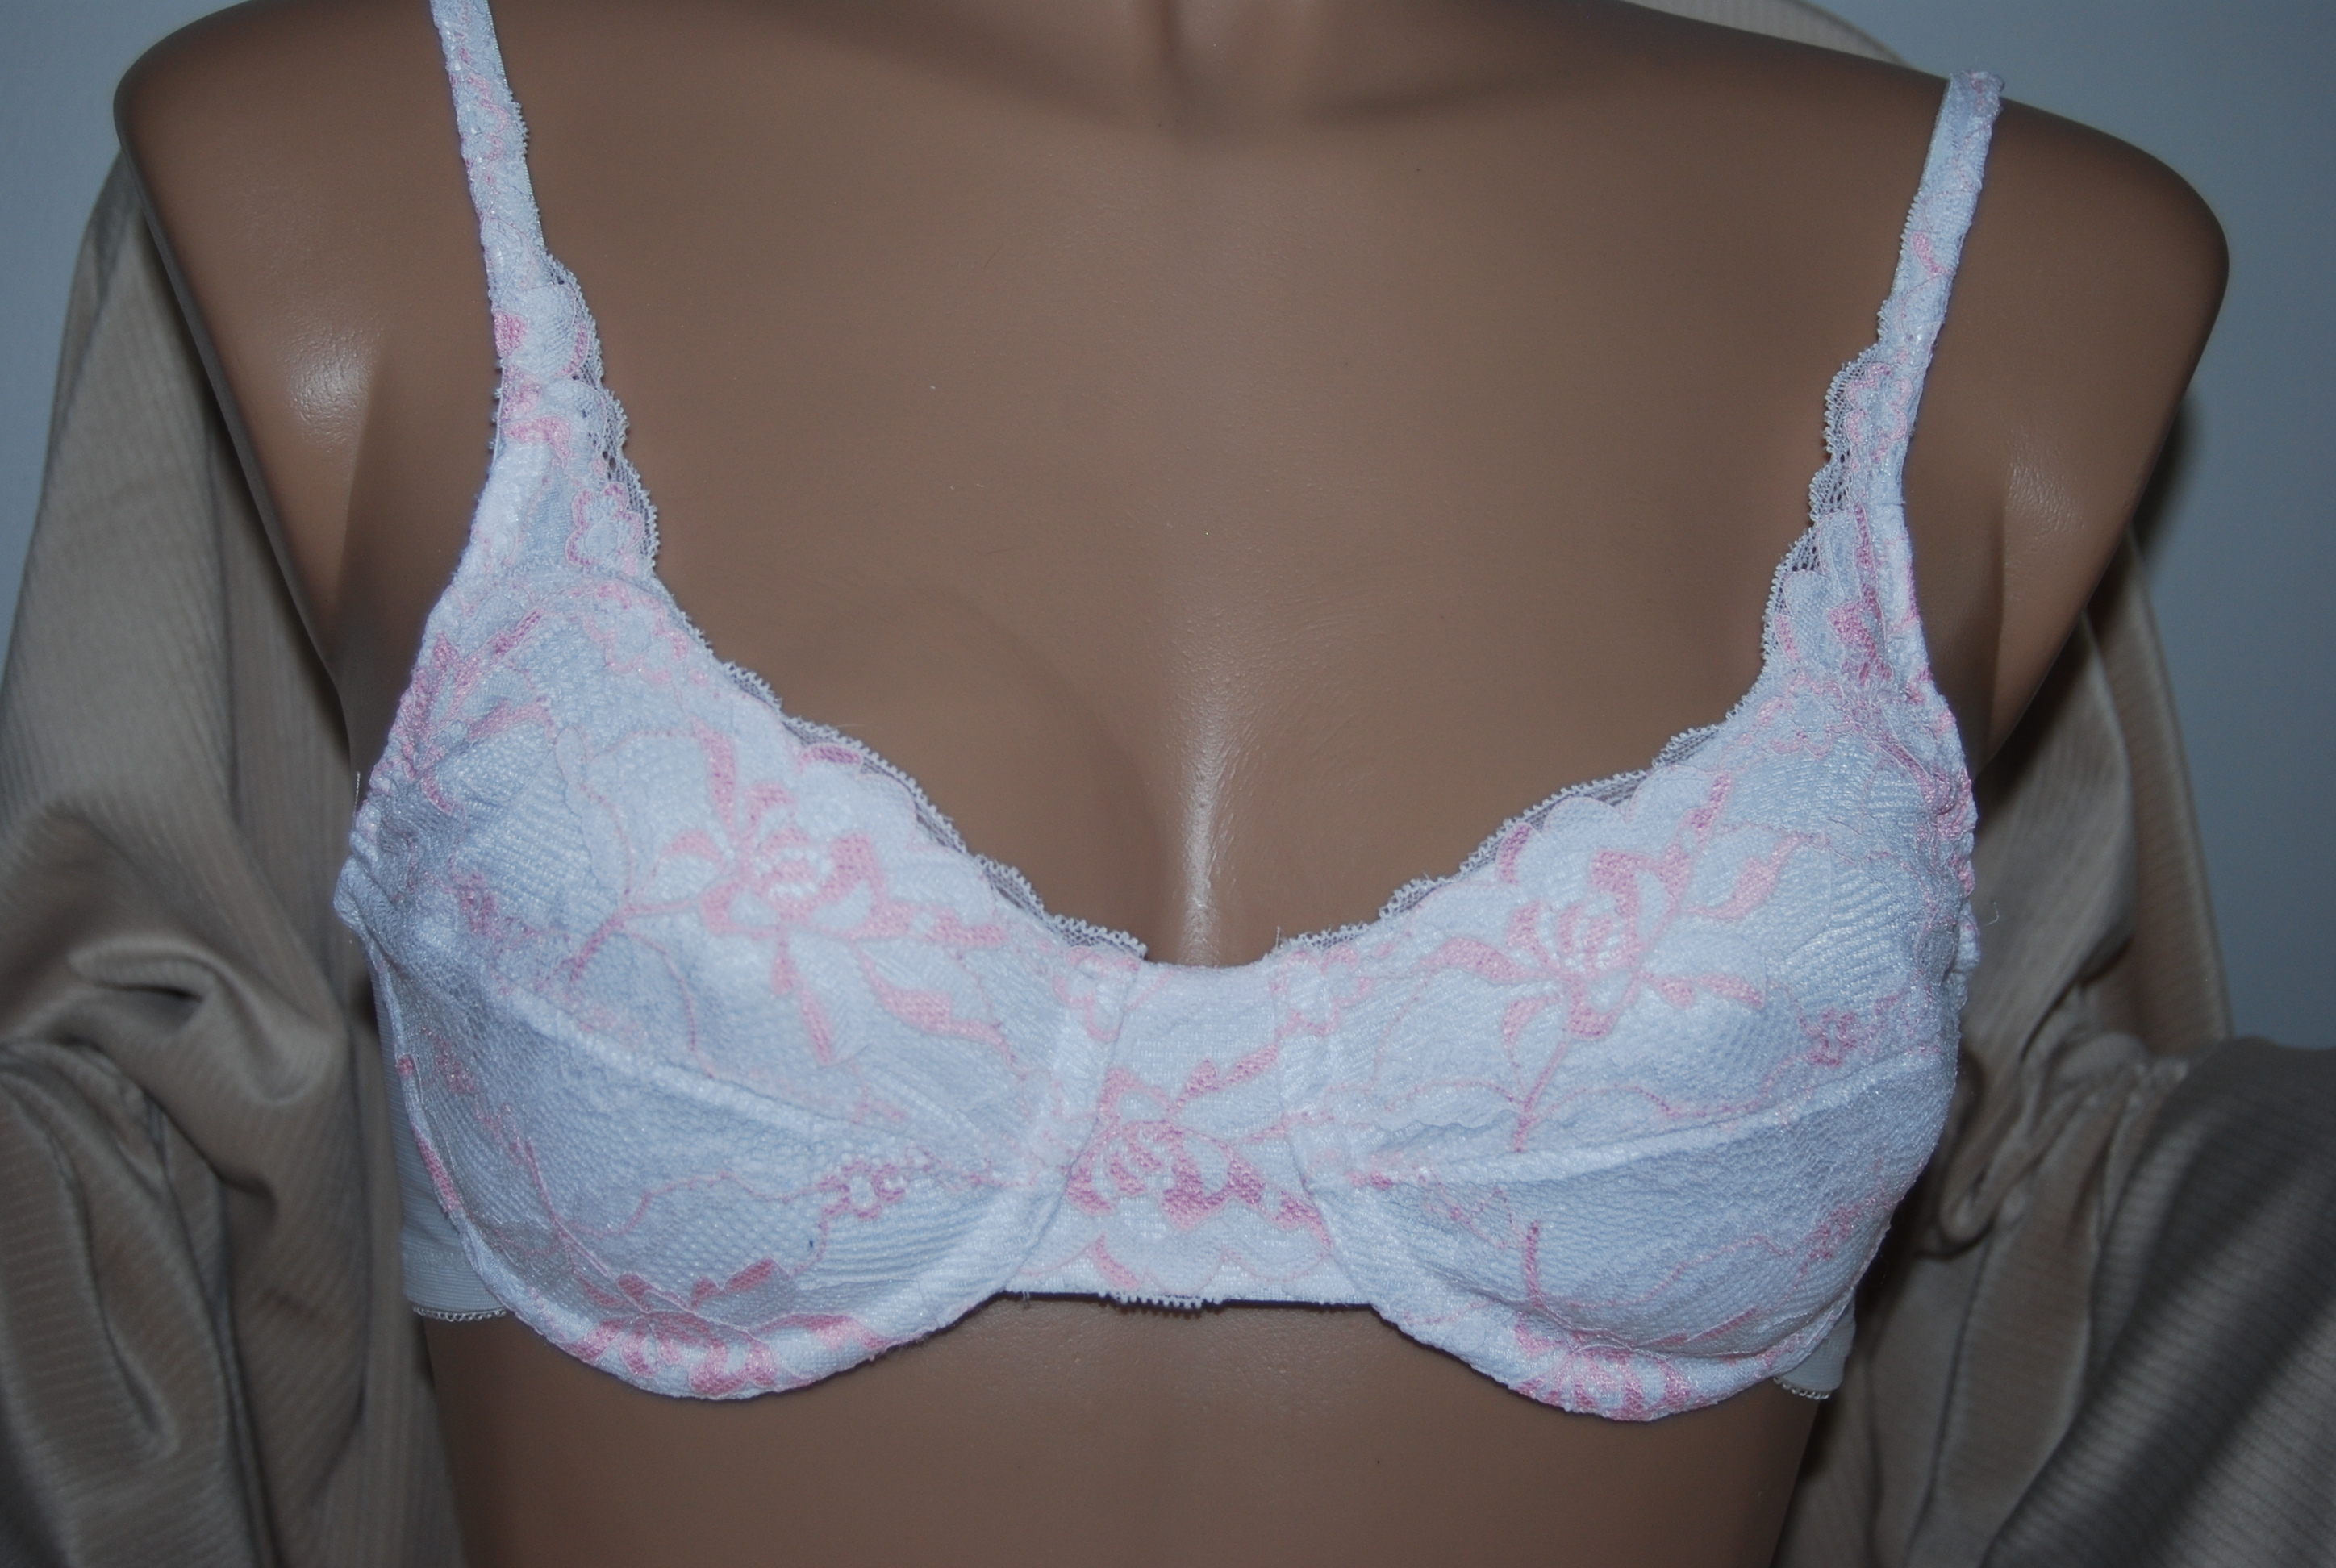
This is the bra I will be teaching in my intermediate bra class. I call it the Hook Up Bra. It is a simple seamed cup with the under front band removed and a T-piece added in the center. It is a great second bra.
For anyone looking for products: bra kits, under wire, channeling, plush back elastic, powernet, and the lycra will find my list of what I have put together just for the purpose of knowing where to go and how to know what type of quality you will find in your purchase. I offer to add products to my orders since I do frequent purchasing for my kits.
There are three main stores on line that sell products that are worthy of paying for even with the cost of shipping. Listed here in no particular order:
There are many other online places to find lace and power net. However I would be careful because unless you know what you are buying, always order a sample so you don't wind up with inferior product or some thing completely different from what you though you were ordering.
Plush backed elastic is very similar to plush back strapping elastic, however each has it's own use. Strapping is for straps and has limited stretch. Play close attention and if you know it's not what you ordered be persistent. it pays off.
